As a developer, I appreciate good documentation, but writing it myself is often cumbersome and feels unrewarding — especially when no one reads or uses it. The reason: documentation spread across multiple tools, with no clear way to find it.
The solution is to use Documentation as Code. In projects where you are already using GitLab, you can write your documentation alongside your code in AsciiDoc, generate it as HTML using AsciiDoctor in GitLab CI, and publish it to GitLab Pages for everyone to read.
GitLab Pages
To tell GitLab that you want to upload static content and publish it as a website, use the pages attribute.
After setting this attribute’s value to true, all the content in the public folder is published as GitLab Pages.
Each time you run the pipeline, the public folder will be cleared, so you don’t have to worry about cleaning up old pages. Just fill the folder, and only the latest pages generated will be uploaded.
GitLab CI
To set up the pipeline, you need to modify the .gitlab-ci.yml file located at the root of your repository. The setup is fairly simple — just make the necessary changes, commit, push, and your page is ready.
As mentioned earlier, you need to set the pages attribute.
To generate HTML pages from AsciiDoc, we use the AsciiDoctor docker image. This makes the AsciiDoctor CLI available.
We use it in the scripts section int the following code block.
stages:
  - deploy

deploy_pages:
  image: asciidoctor/docker-asciidoctor:1.84
  pages: true
  stage: deploy
  script:
    - |
      asciidoctor \
      --attribute data-uri \
      --attribute toc=left \
      --attribute sectnums \
      --attribute reproducible \
      --attribute icons=font \
      --attribute source-highlighter=Pygments \
      --attribute experimental \
      --require asciidoctor-diagram \
      --destination-dir public \
      --source-dir src 'doc/**/*.adoc'
  rules:
    - if: $CI_COMMIT_REF_NAME == $CI_DEFAULT_BRANCH && $CI_PIPELINE_SOURCE != "merge_request_event"
      changes:
        - doc/**/*
        - .gitlab-ci.yml
An explanation of the attributes used can be found below:
--attribute data-uri: graphics as data-uri; self contained file--attribute toc=left: display table of contents on left side--attribute sectnums: display section numbers--attribute reproducible: no last updated timestamp--attribute icons=font: use font based icons--attribute source-highlighter=Pygments: set syntax highlighter--attribute experimental: add UI elements for buttons and key bindings--require asciidoctor-diagram: load diagram library to use diagrams--destination-dir public: setpublicas output folder--source-dir src 'doc/**/*.adoc': define input files
To keep our build times as few, and as short as possible we only want to deploy new pages when something changes on the main branch.
We can even optimize this further by telling GitLab to only run the generation if the documentation itself changes or if something in the process specification changes.
These conditions are specified in the rules section of the deploy_pages job.
Generating pages
The process is defined to take all .adoc files and generate pages from them. So, let’s create a file named index.adoc in the doc folder.
We name it index, so that an index.html page is generated, which will automatically be displayed when you visit the URL of your pages.
An example might look like this:
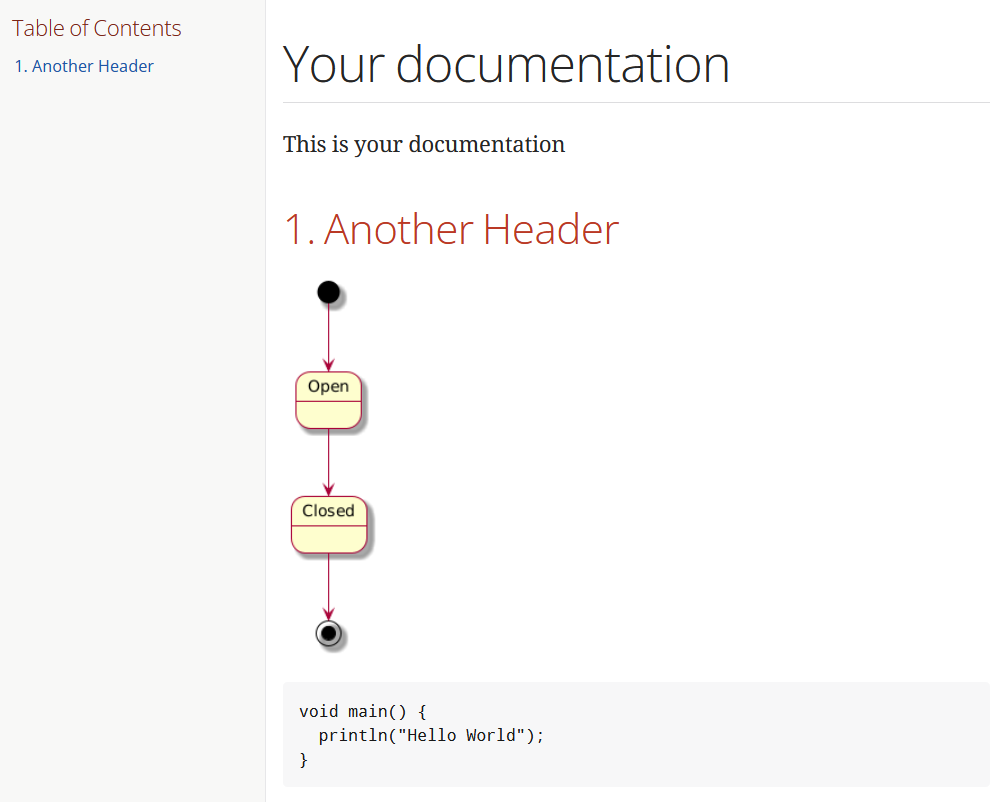
= Your documentation

This is your documentation

== Another Header

[plantuml]
----
@startuml

skin rose

state Open
state Closed

[*] --> Open
Open --> Closed
Closed --> [*]
@enduml
----

[source,java]
----
void main() {
  println("Hello World");
}
----
Results
After committing and pushing your file, the pipeline will run. As soon as the pipeline finishes (you can watch it in Gitlab under Build > Pipelines) you can find the link to your Pages website at Deploy > Pages.
The result should look like this:
 If you want to take a closer look at the generated page, you can visit the Pages I generated.
You can see the full code on GitLab. Feel free to copy it and adjust it to your own needs.